
A Step-by-Step Guide on How to Waterproof your Bathroom!

When waterproofing a shower, it's important to know exactly where you are putting your shower. For example, you need to know where the water could reach once you have chosen the design and frame of your shower, as well as your showerhead. Once you know exactly where your shower is going and where the water could spray, it's time to start measuring and waterproofing your shower. Before you start waterproofing, make sure you have installed your Wondercap Retro Kit. The Retro Kit is designed to allow you to waterproof and bed your shower all whilst keeping a clean drain and even surface. To install your Retro Kit, please click here to view our step-by-step installation guide.
Here are the items and tools that you will need to waterproof your bathroom!
Dustpan and broom or vacuum cleaner
Sandpaper
Waterproofing rubber paint
Grout mix
Bedding mix
Paint brush
Paint roller
Primer
Tiles
Silicone and silicone gun
Paint scraper
Paint mixer
Spirit level
Now let's get started!
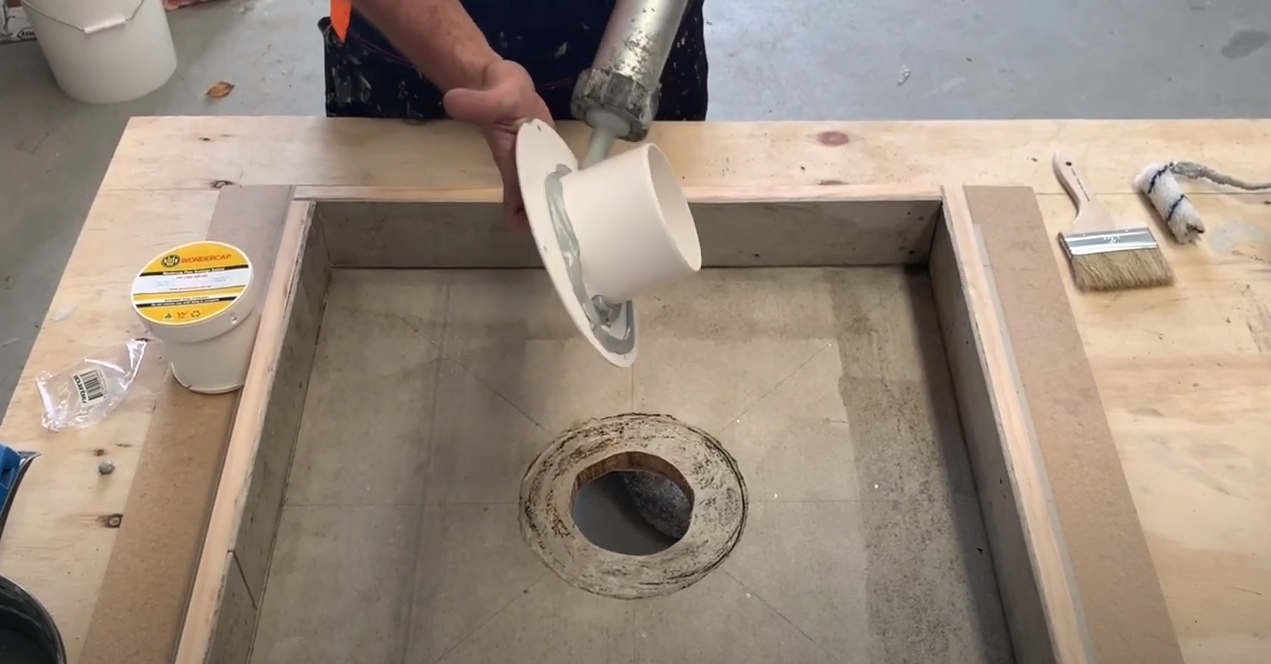
Step 1: Install the Wondercap Puddle Flange
Use a solvent to glue the puddle flange tail into the drainage pipe. Then glue the puddle flange brim to the concrete surface. Or you can screw the flange into the concrete, using the green plus and counter-sunk screws.
Step 2: Sweep and Prep
Sweep and prep the surface area of the shower. This will allow optimal results for the waterproofing membrane.
Step 3: Measure and Mark with Paper Tape
Grab yourself a pencil and a measuring tape, it's important to get this perfect for the best result. Measure up point to point where you are going to have your frame of the shower, and give yourself an extra 100mm to 200mm for incidents. For a guide, it's best to extend your waterproofing 100mm above your water outlet and 100mm wider than the edges of your shower.
*Always check your local council regulations to make sure you're in the clear, and that you won't be having to do another renovation anytime soon. Once you have pinpointed your measurements, it's time to get the good old masking tape out and start masking out your waterproofing area.
*Pro-Tip: Mark the floor into 4 parts so that once priming you can allocate what is drying.
Step 4: Prep the Area
Now it's time to pop on those gloves and get out a brush! It's time to prime that area! If you have any leftover paint or uneven surfaces, make sure you sand it back to give yourself the best surface possible. The primer needs to be a paint that is appropriate for waterproofing. It is best to ask your local hardware store which one they will advise on as most of the time they have products that work well together. Now that you have your primer, brush, or roller, it's time to dunk that brush and start coating! Make sure to use a generous amount, and plan your way through the priming. That way you can start waterproofing whilst the other side of the primer is drying.
*Pro-Tip: If you marked out the floor, then you can prime two squares that are diagonal across. That way you can prime the walls opposite so that once you have finished with the walls you can then finish the floor with the other two squares left.

Step 5: Silicone the Gaps
To prevent any leaks and spaces, grab yourself a silicone seal gun and fill in the gaps. Hold the silicone gun at a 45-degree angle and squeeze whilst moving slowly to ensure that the silicone is distributed evenly for perfectly sealed corners and edges. After each strip that you seal, it is best to take a damp finger and just stroke your finger down the silicone to make sure it's concealed tightly into those gaps. Allow 24 hours for drying.
Step 6: Position the Wondercap
Pull out the inner part of the puddle flange and set it aside.
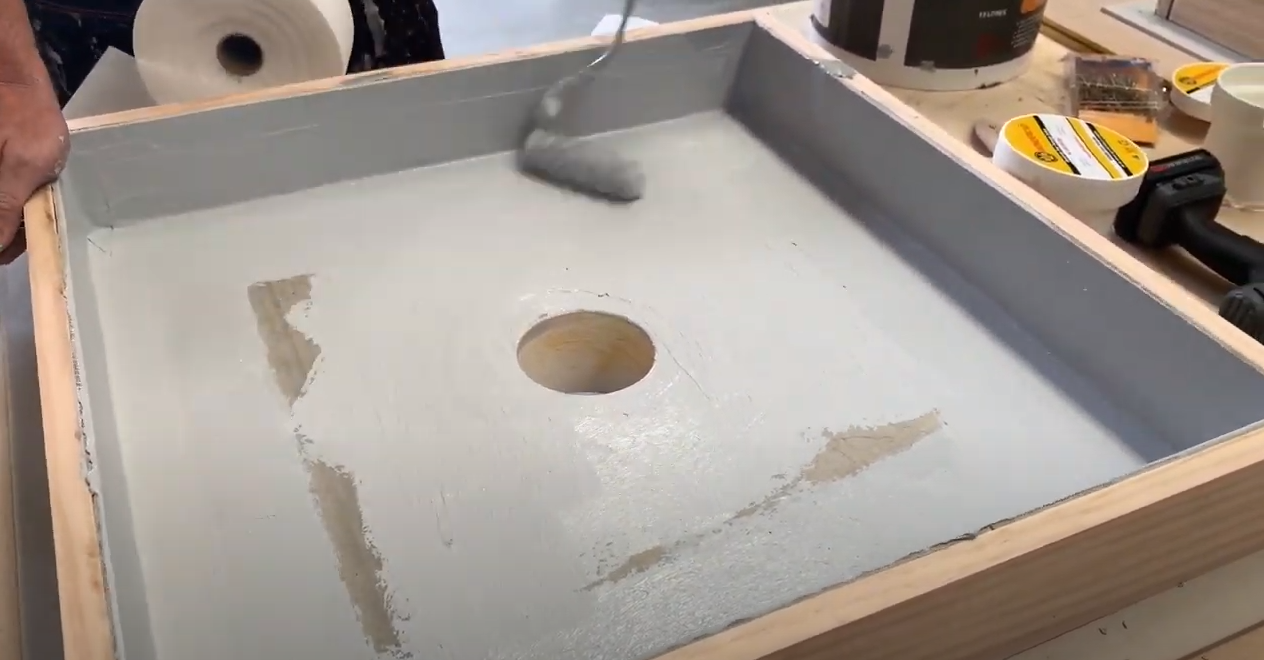
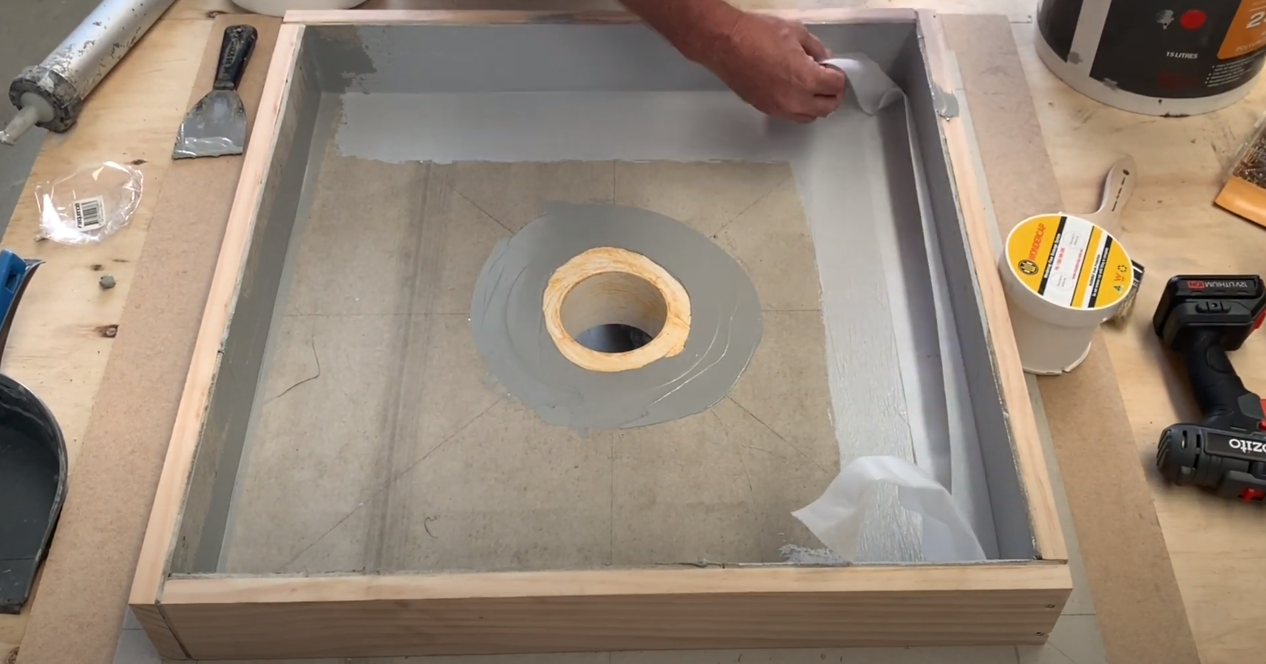
Step 7: Waterproof the Shower Walls
Now you can start waterproofing! For a perfect adhesive, make sure your primer is well dried and that you follow the same process and order in which you painted your primer.
Use a roller and paintbrush to coat the walls and floors.
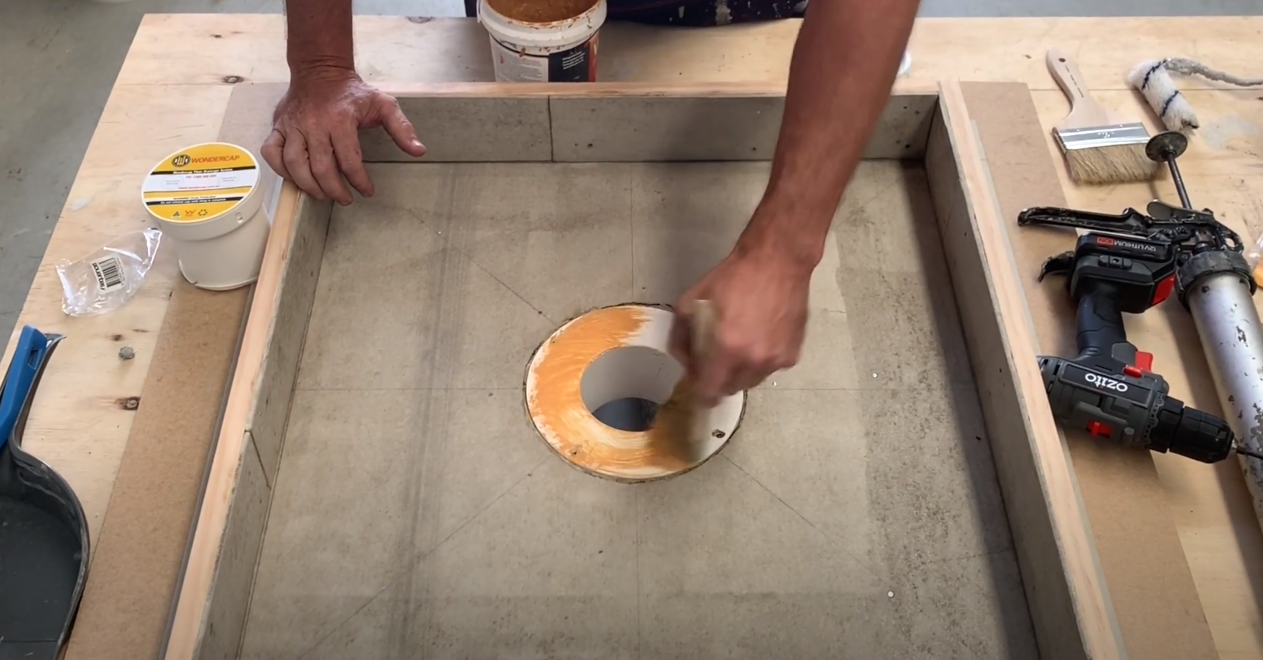
Step 8: Waterproof the Wondercap
On the Retro Kit puddle flange, you will see a clear line written "waterproof to this line", paint up to that line. DO NOT APPLY THE WATERPROOFING PAINT PAST THAT LINE.
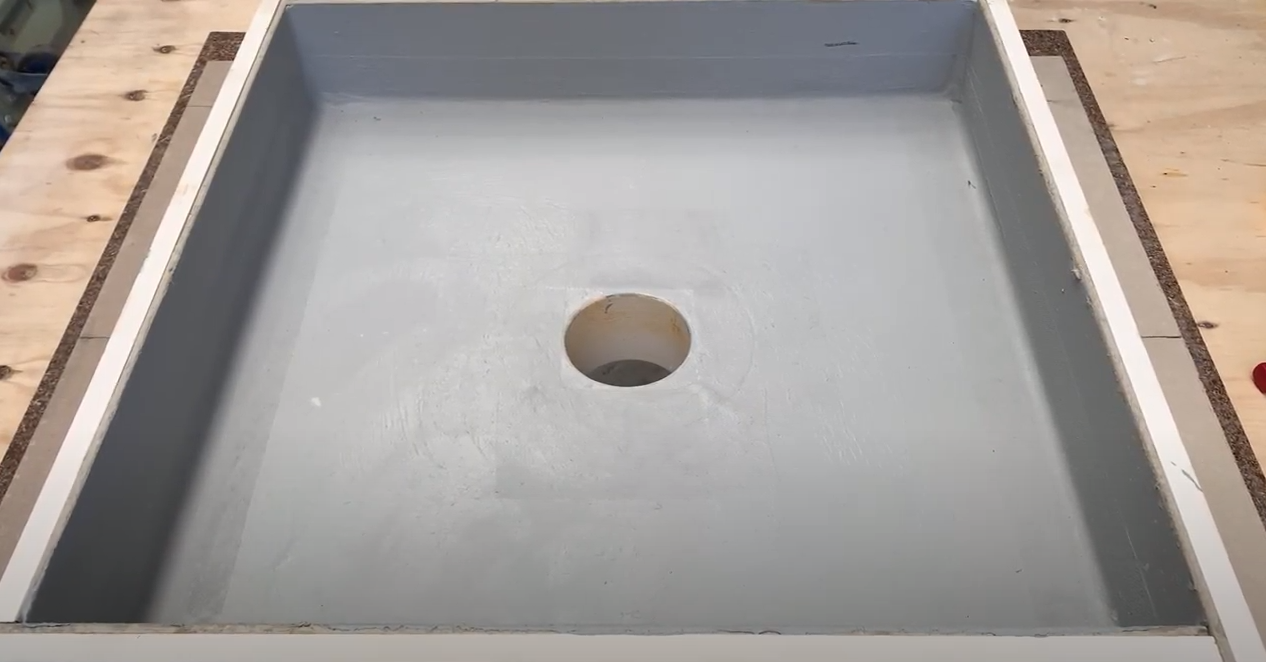
Step 9: Second Coat
Give the first layer 24 hours to dry. Then go back in with your waterproofing paint to start your second coat of waterproofing membrane to your shower and bathroom floors.
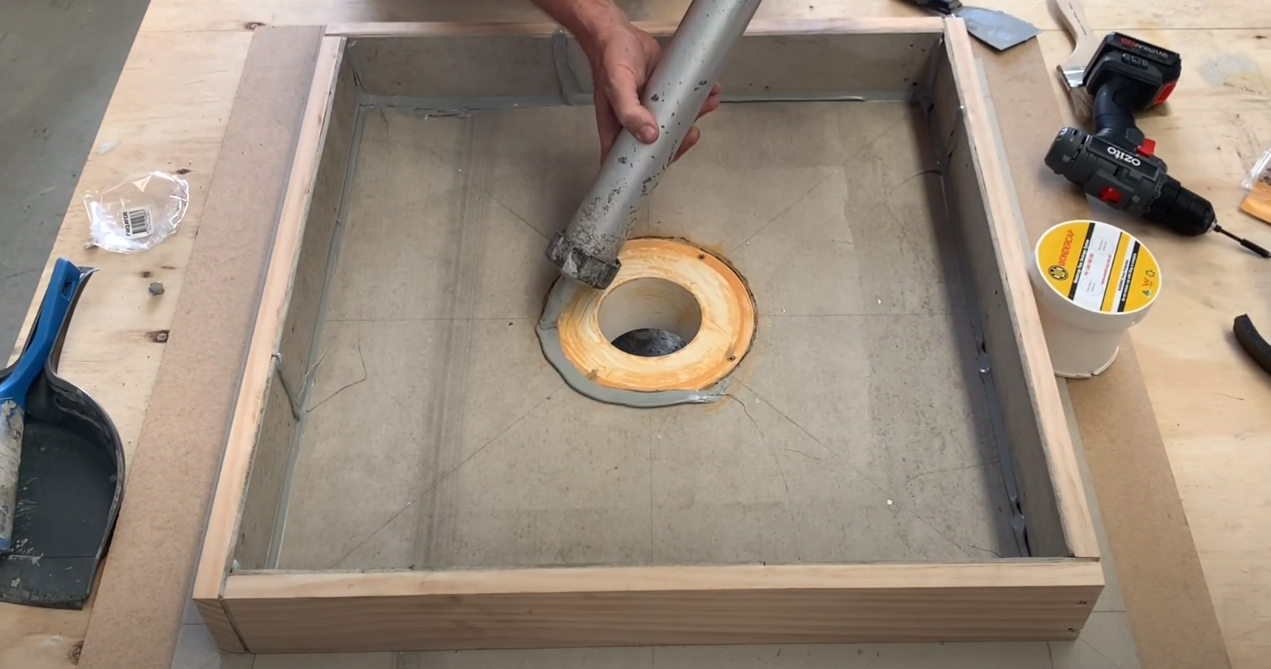
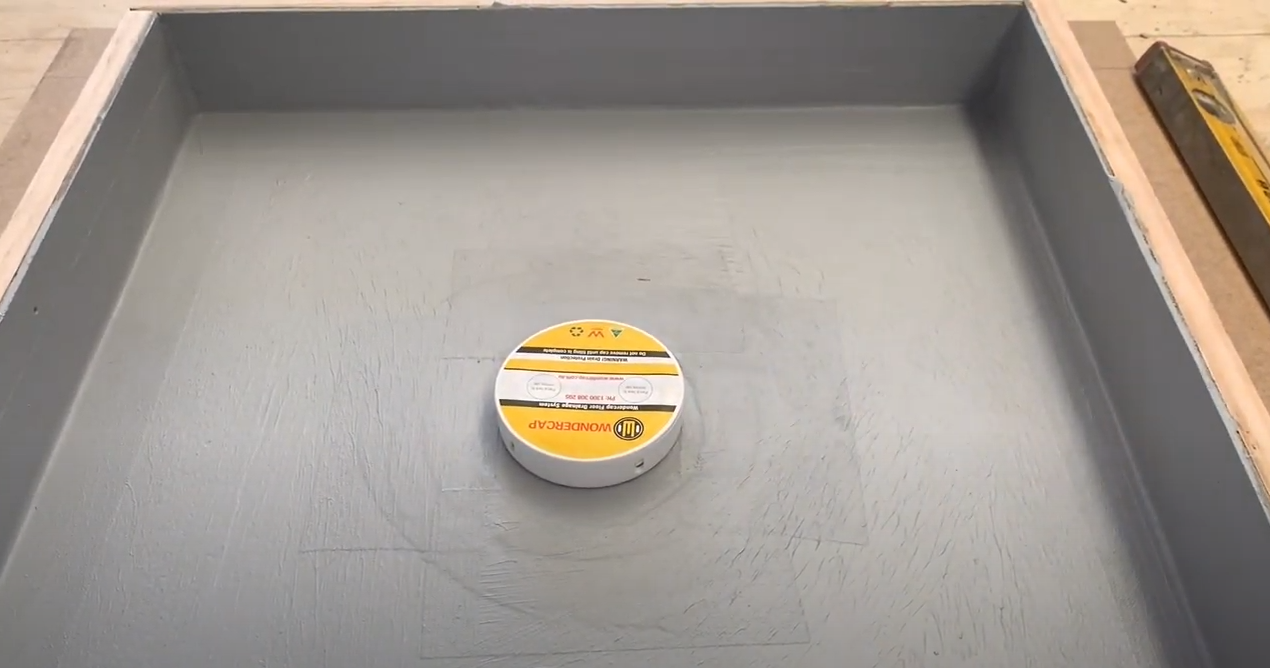
Step 10: Reinsert your Retro Kit
Reinsert the base (inner puddle flange kit) to the height and position once the waterproofing has dried.
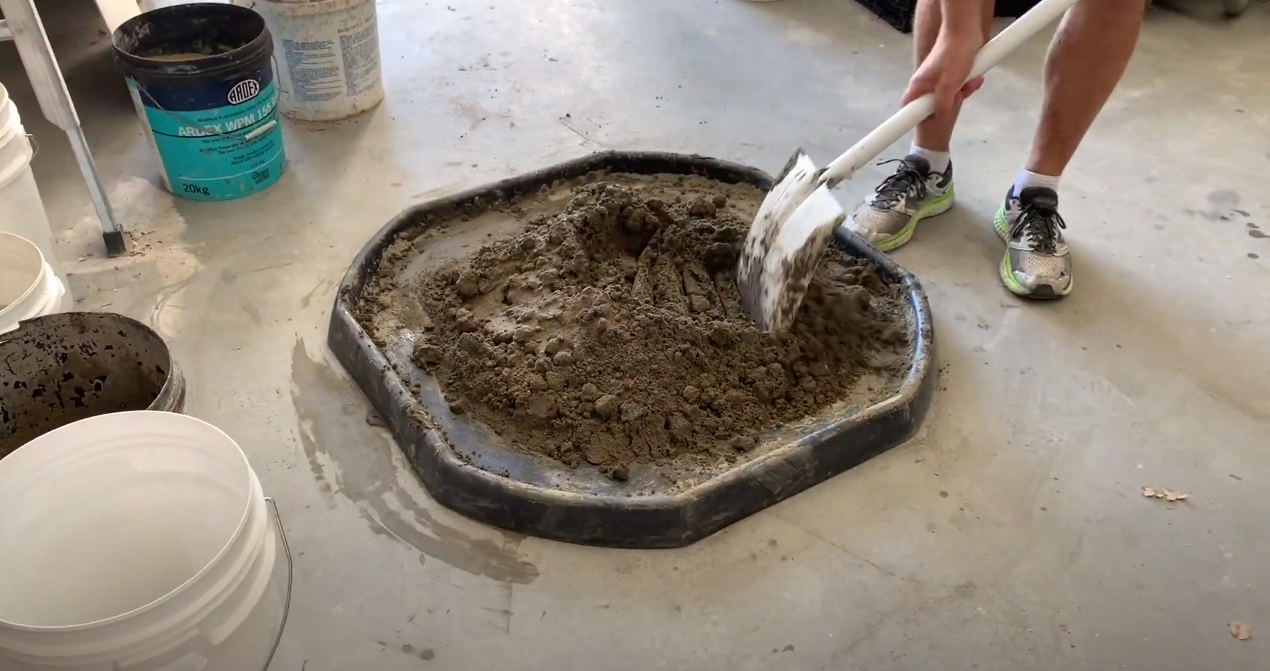
Step 11: Bedding
Mix your bedding mixture and pop it around the base where needed.
Step 12: Pre-slope Using Bedding
In your four corners of your shower, you must have a 1.25cm height above your shower drain bedding for every 30cm out to the edge. For example, if you have a 900mm x 900mm shower floor, you would raise the bedding 1.25cm for every 30cm. Once you have reached 30 cm. you would then increase it (1.25cm x 2) by 2.5cm, then repeat that to the next 30cm until you reach the four corners. This gives you a perfect slope for your shower.

Step 13: Grout and Tile
Now apply your tiles to the wet bedding and grout the tiles.
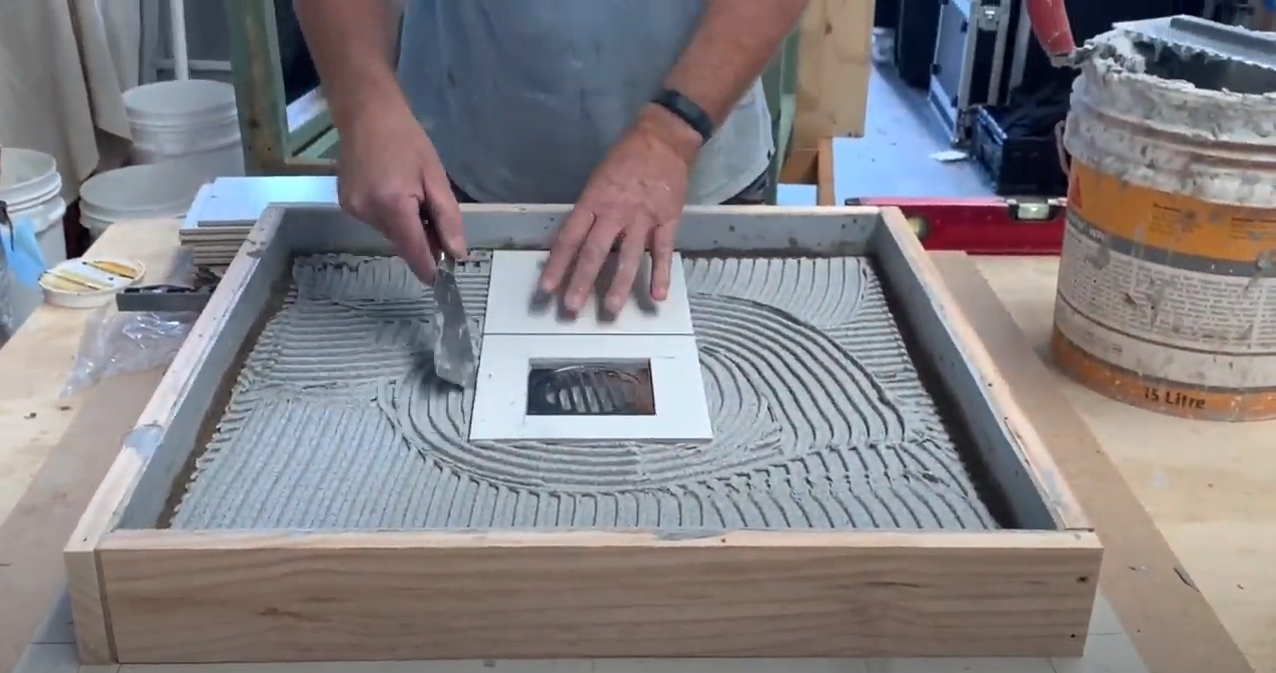
Step 14: Cut the Tiles to the Wondercap
Use the cap to cut your tiles perfectly!
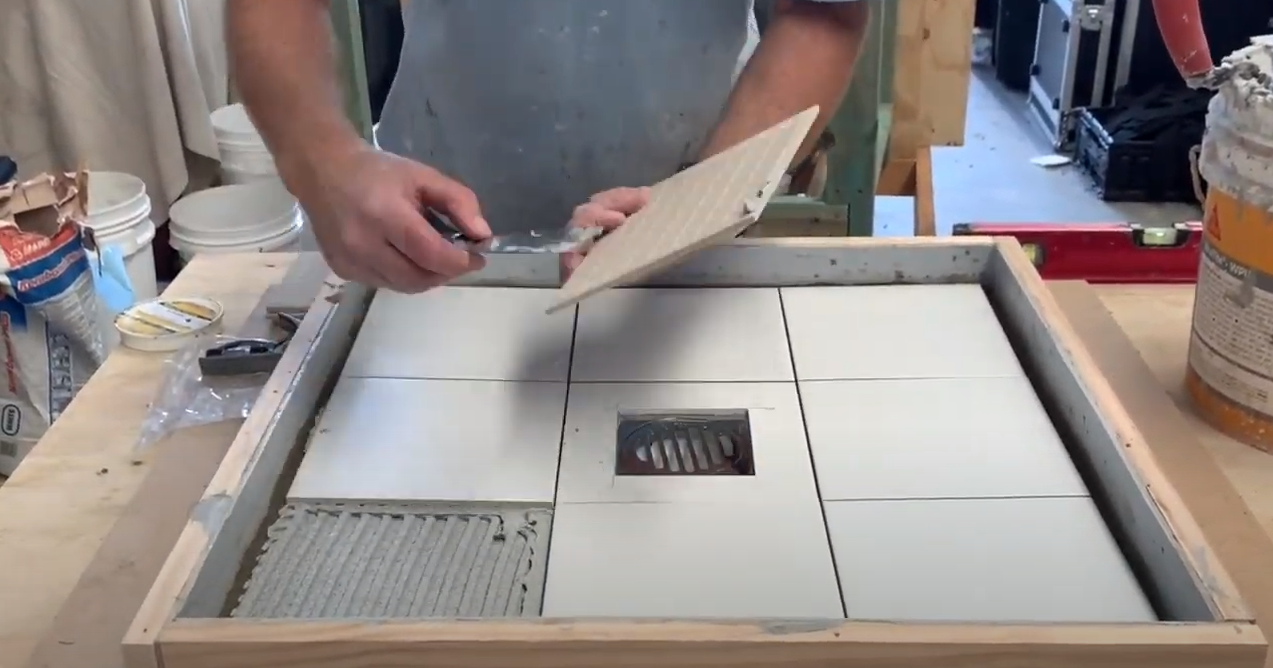
Step 15: Finishing Touches
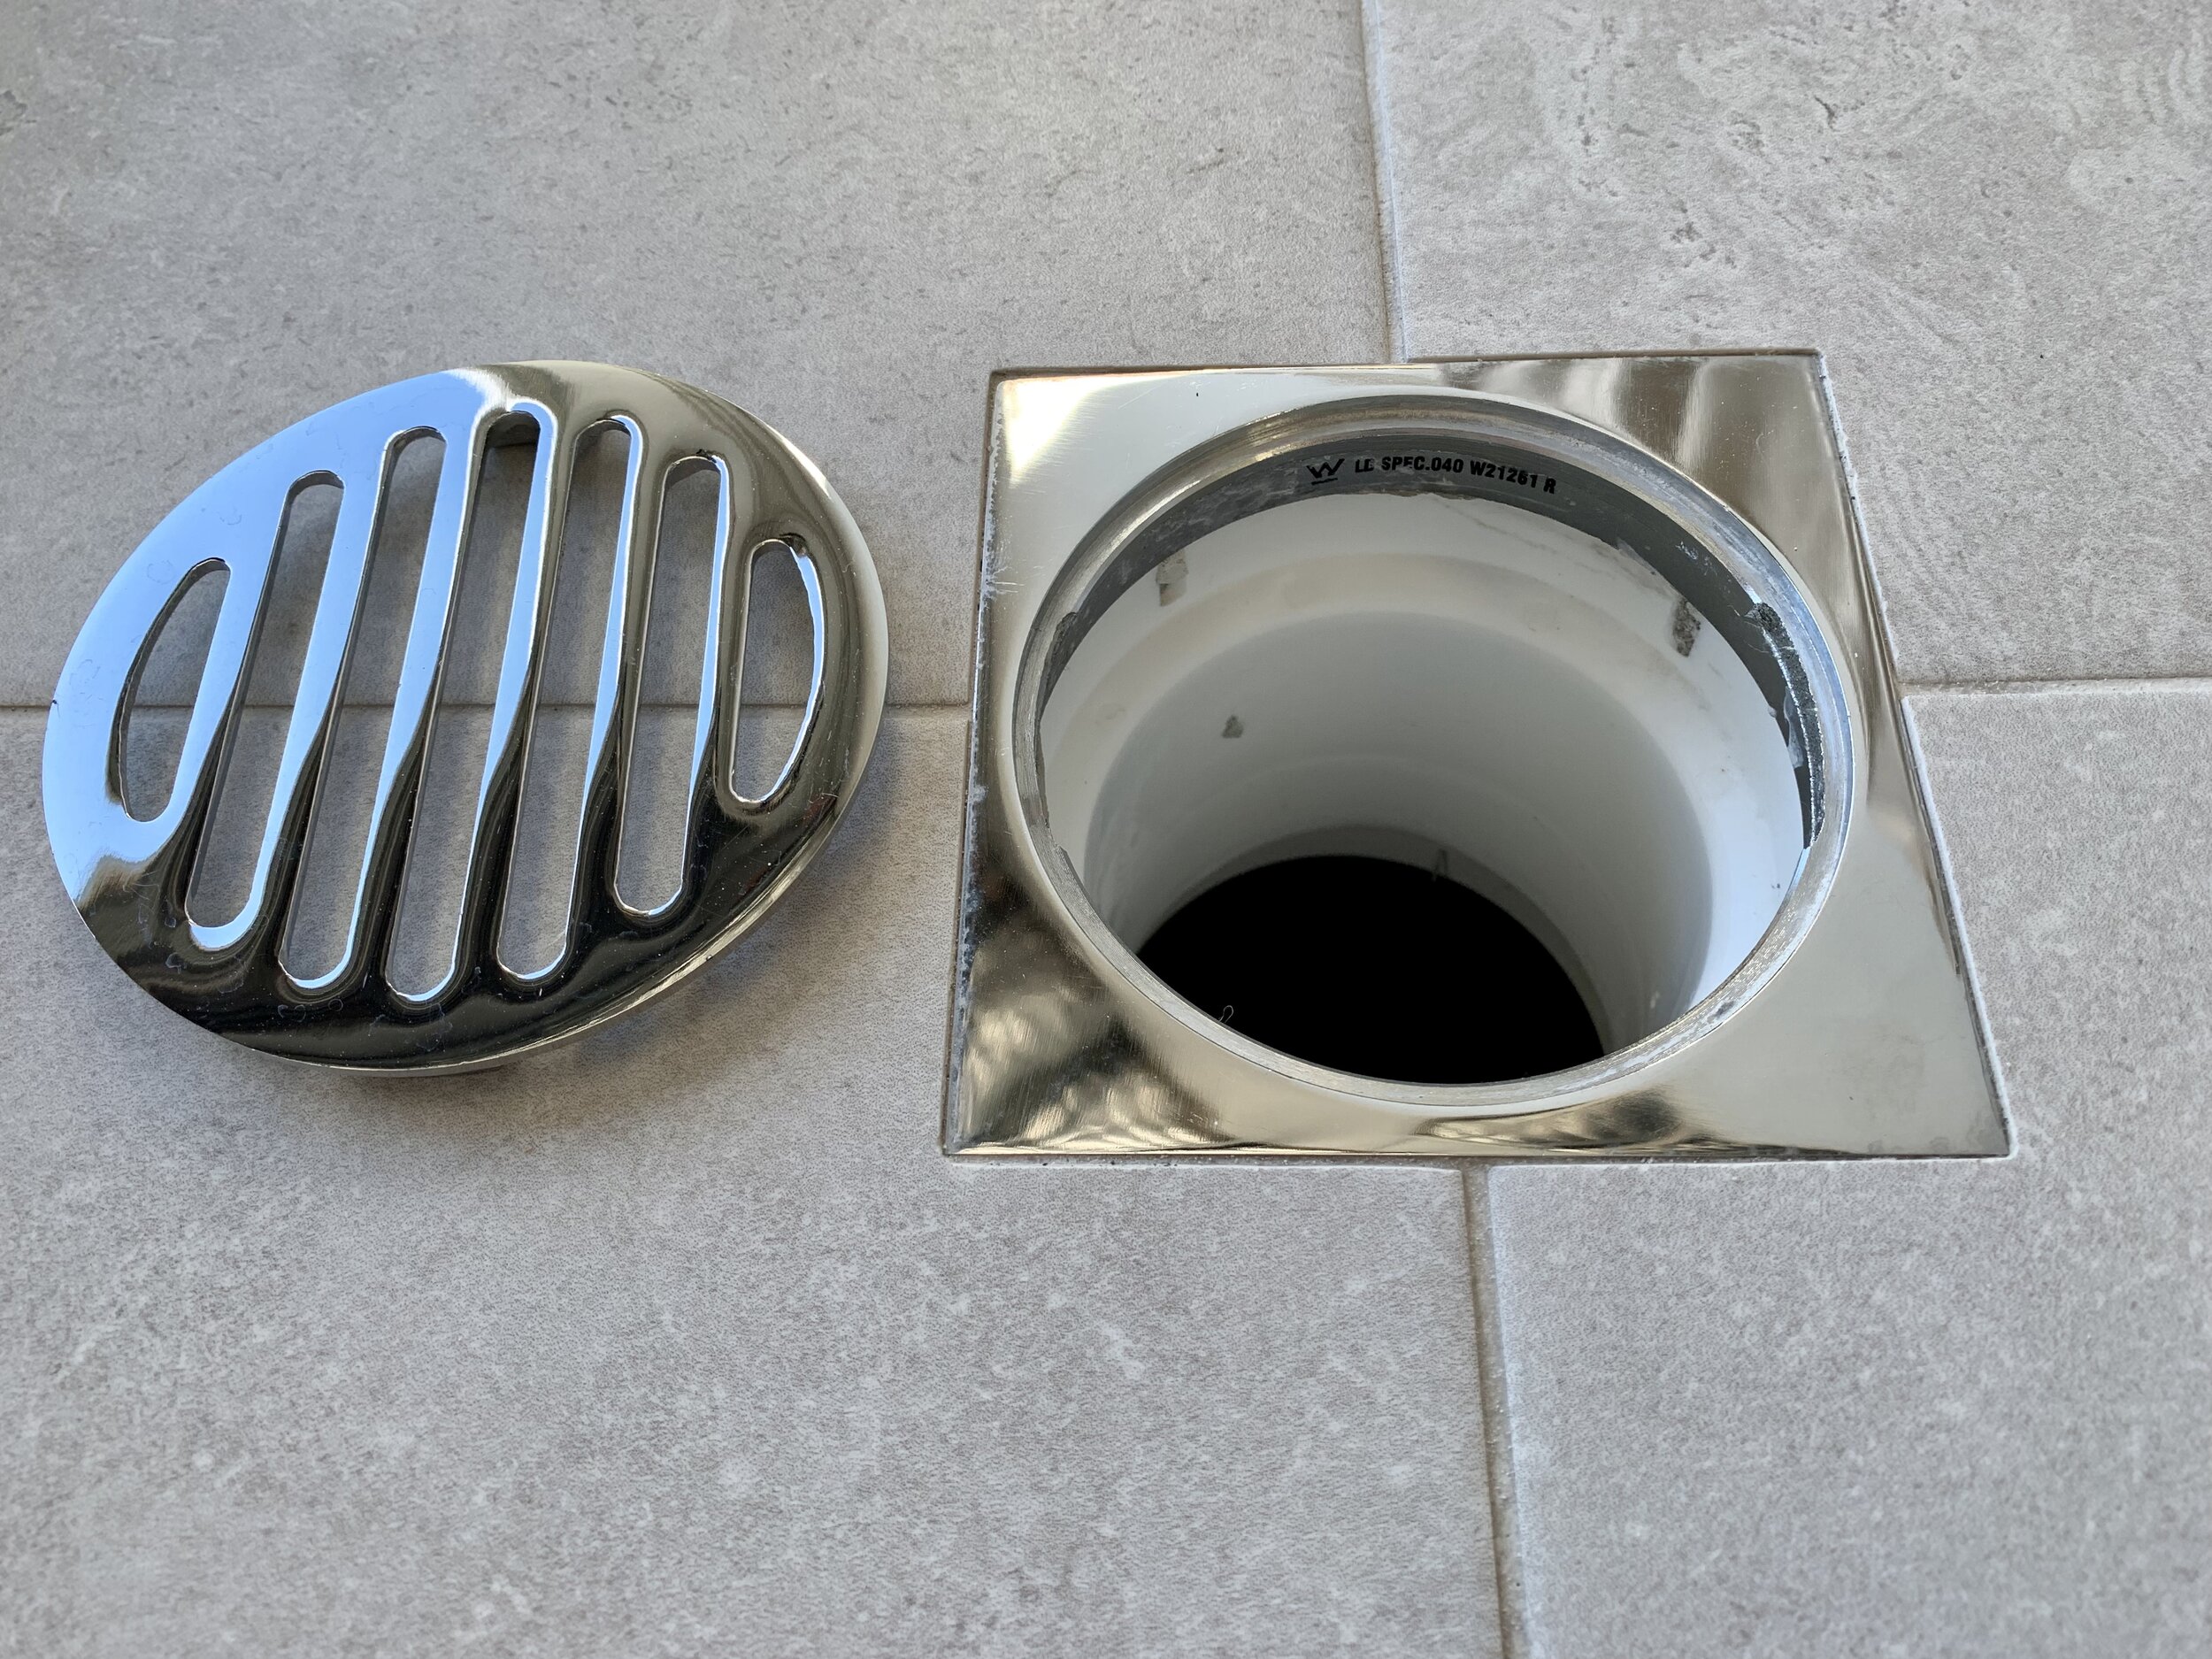
Now that the grout is dry and the tiles are situated, do a quick mop over the tiles and tiled walls. Take out the cap and place your grate inside. You will now have a perfect waterproofed and tiled surface area with the perfect grate.
For more installation help, feel free to send us an enquiry or call us at (07) 5539 3665.